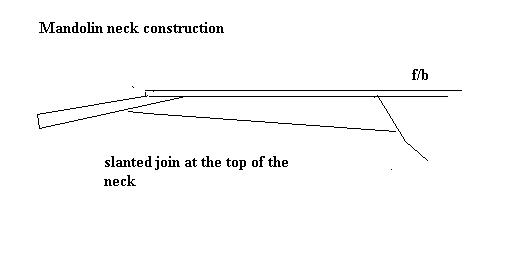
| Home | Re-veneering | Mandolin Neck | Re-setting | Hospital |
|
Bowed Neck |
||
|
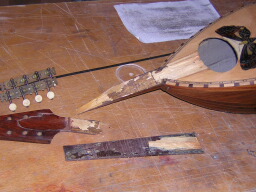
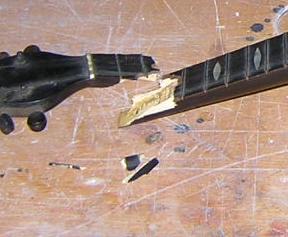
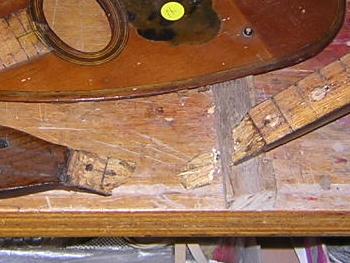
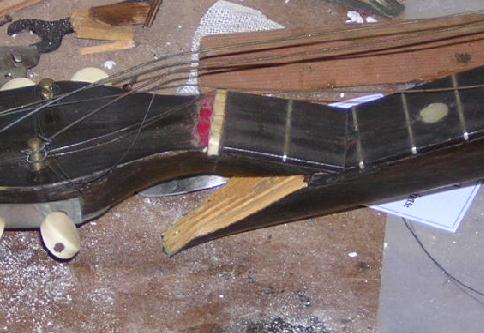
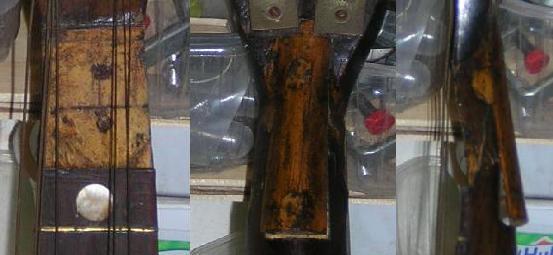
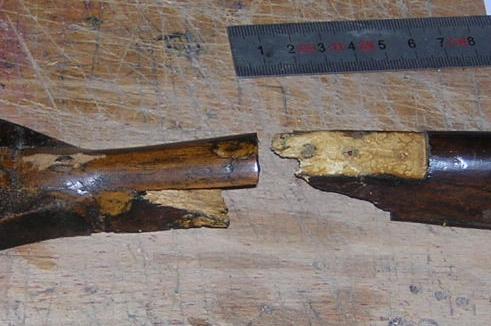
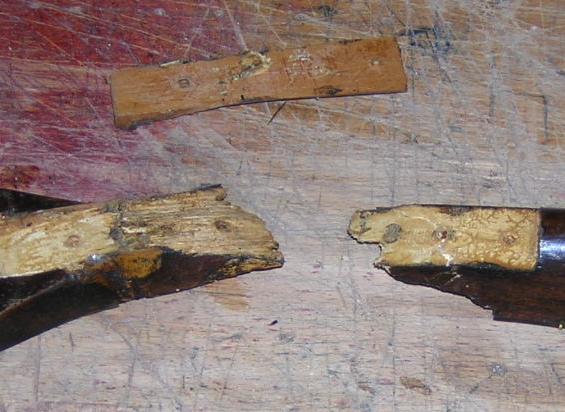
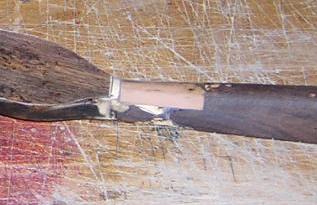
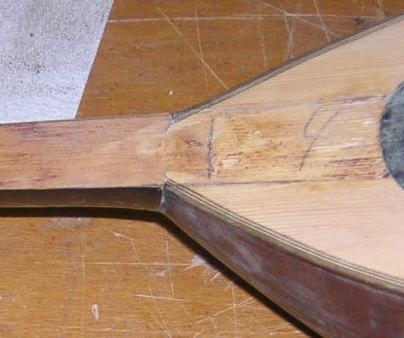
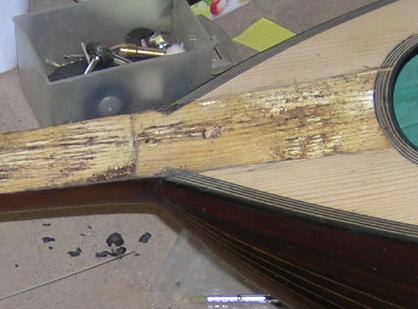
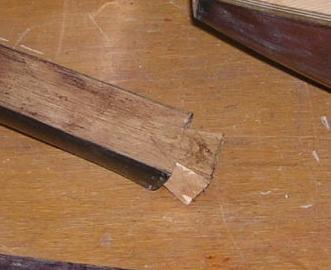
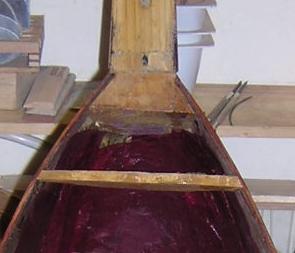
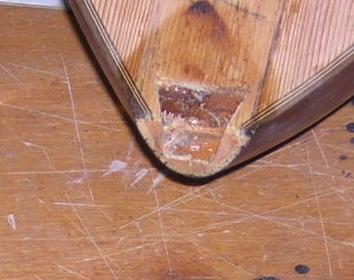
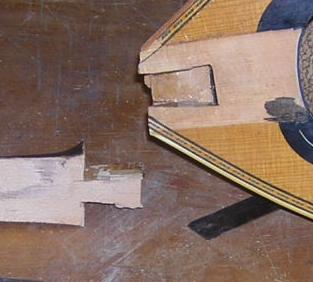
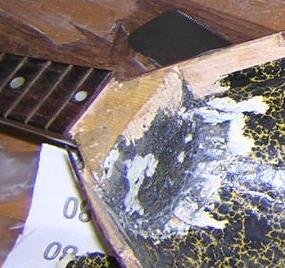
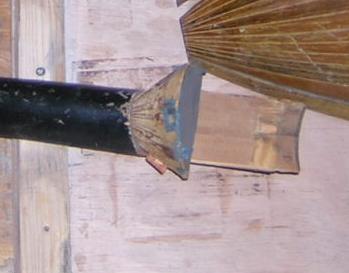
One of the first things obvious in many old mandolins, is that the neck appears warped. This is possible, but the problem is usually movement at the neck-body join. Unseasoned wood, excessive string pressure, or even exposure to high temperatures, can result in movement at the join, often resulting in the neck being pulled up, and/or the back being deformed or splitting. If this is more than slight, it will make the instrument unplayable. |
![]() |
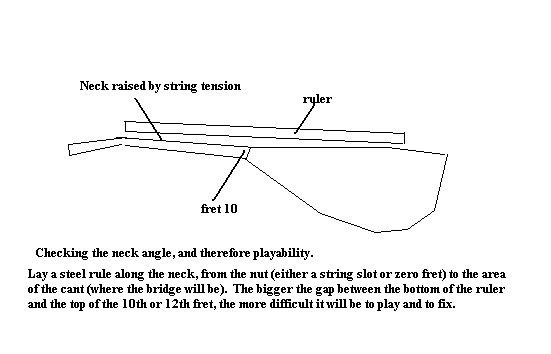
The most fundamental aspect, other than obvious damage which needs to be repaired, is to assess how playable the mandolin is going to be. Re-setting the neck is a difficult and time consuming exercise, and should not be undertaken lightly. All other aspects should be explored first. |
| Neck-body seating | |||
| A common problem with old mandolins, caused by new strings, is the dislocation of the neck. Often the seating of the neck gives way, as here. | ![]() |
In other mandolins, such as this one, not only is the fingerboard warped, making the instrument unplayable, but also the bowl itself is split by the displaced neck. | ![]() |
| The neck must first be removed from the seating, often difficult, as the fitting is usually wedge-shaped. Left, much of the neck fitting has been left in the body. | The seating must be cleaned up for re-fitting, and in this case, the foot of the neck will need to be re-built. | ||
| Here, neck and body have separated quite well, with the worst damage being to the integrity of the bow's narrow end, with splits in the seams between several of the narrow ribs. | A complicated clamping system must be used to re-glue the damaged narrow ends of the bowls, because of the steep slope of the bottom. This provides a sound housing for the neck. | ||
![]() |
|||
| The same taped triangular block is used to provide a stable platform against which to clamp the neck back in firmly. Great care needs to be taken over the angle of the neck relative to the top, as this will affect the set-up and action; and the correct alignment of the neck along the instruments centre-line...a crooked neck makes the mandolin equally unplayable. | After replacement, if it is done well, the
damage to the neck seating and bowl should not be visible, and the new
join should be as strong, if not stronger than the original.
|
![]() |
|
| Repairing a Snapped Neck | |||
![]() |
![]() |
![]() |
|
| Finally, if the neck-body join holds, occasionally the neck will be snapped as with these instrument. Left, the two sections will be re-glued with a strong modern adhesive as the break was partial but clean, being held together by the f/b. With the second a similar solution, though the break is along the diagonal head-neck join found in many 2-piece Italian instruments and the f/b was completely shattered. The third and fourth have both split along the diagonal join as well. | |||
![]() |
Most of the Italian mandolins had a 2 piece
neck and head arrangement, as it was much more economical than to carve
both together out of the same block of wood. The join that seems to be
visible at the end of the neck, is only the end of the veneer. The real
join is not immediately evident because most of the necks are veneered,
which hides the join nicely, but also strengthens it on the 'lamellar
principle'.
When this join goes, often the fingerboard goes too, and you are lucky if you have all the pieces to re-assemble.
|
||
Here is a typical problem..... a neck that has split along the diagonal glue join, that has been repaired previously. A piece had been inserted The first task when repairing a break is to assemble the pieces, or in this case, to remove the old failed repair and clean off all glue. |
![]() |
||
You first need to decide whether you glue the neck and f/b
together, or
remove the latter first. I usually remove the f/b first for 2 reasons.
|
|||
![]() |
![]() |
![]() |
![]() |
| First I carefully split apart the neck trying not to damage existing pieces. It looked like the extra piece had been glued in to hold a weak join, but perhaps the join itself was not made-good first. | Next the failed insert was removed and glue cleaned of the surfaces to be rejoined. It is necessary to trial fit the pieces carefully before gluing to ensure a good fit. | In this case the regluing was in 2 parts, first the neck was re-glued, with cascamite, a strong modern glue. | Then part of the inserted piece was glued back to re-enforce the join and rebuild the neck shape. A separate piece was inserted in to the cavity in the head. |
| Afterwards, both the head back and the neck were re-veneered, to add extra lamellar strength to the repair, as well as to improve its cosmetic appearance. | |||
| It is very difficult holding a
neck under pressure when trying to reglue parts of it, so you will need to
build a simple neck clamping block to help.
The simplest way to do this, is to cut some blocks 70 x 40 x 15mm for the base, and 40 x 40 x 15mm for the shoulders. Cut shoulders as opposite, glue and fit felt. Tapering to one end, and several different width gaps are useful as necks are not a uniform size or shape. |
Neck clamping block
|
![]() |
|