Home Hospital Mandolin Veneer Contact Restoration Parts


Re-veneering the head       (For neck veneer, see the restoration parts page.)
 

   The old Italian bowl-backs, tend to have necks and heads made from a cheaper wood like maple, and be veneered in the more expensive rosewood. Not only is the head a convoluted shape, the veneer thus must be glued on in  up to 6 pieces, many narrow or curved, but it is also pierced by tuners and their attendant screws. As a result, damage to this veneer is frequent.

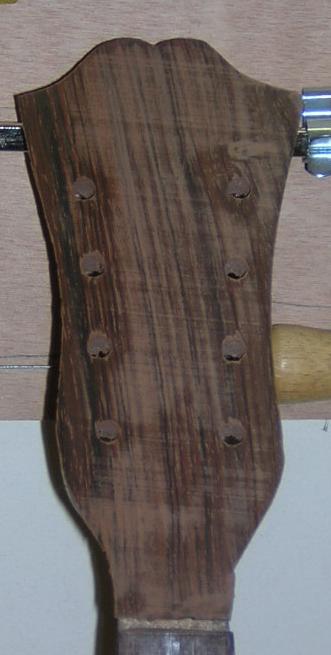
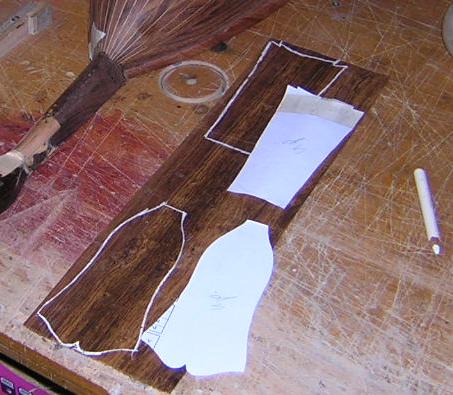
It is difficult to match the colour pattern and thickness of a veneer, evidenced by an old repair. Often it is only feasible to re-veneer the section.  This one has been glued and drilled, but not as yet been 'finished'.  
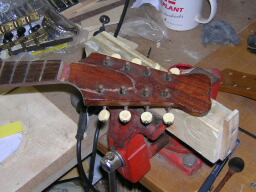
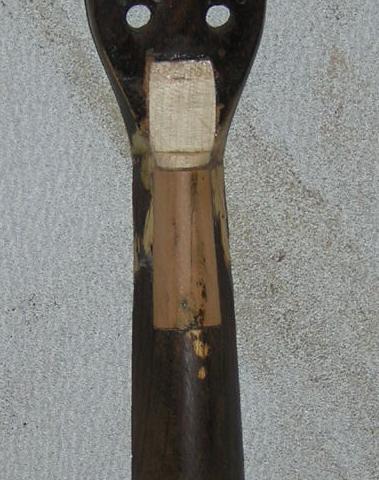
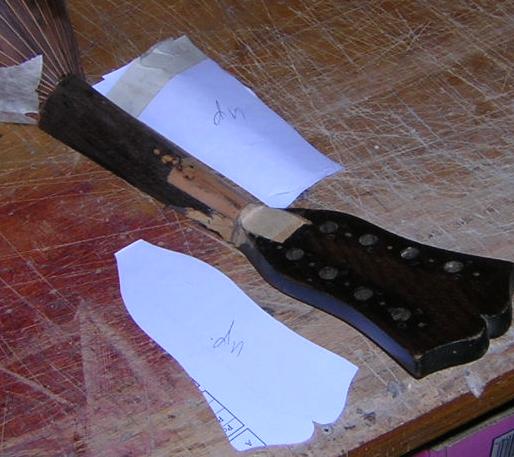
 1.  In this example, the head has split completely, and though it has been successfully re-glued, the damage to the veneer is all too visible and ugly.  
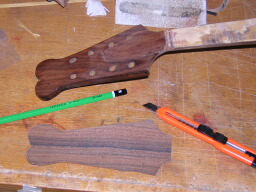
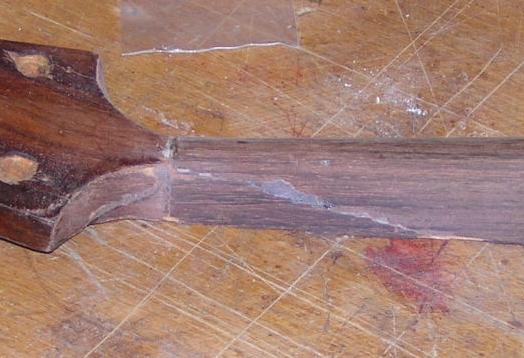
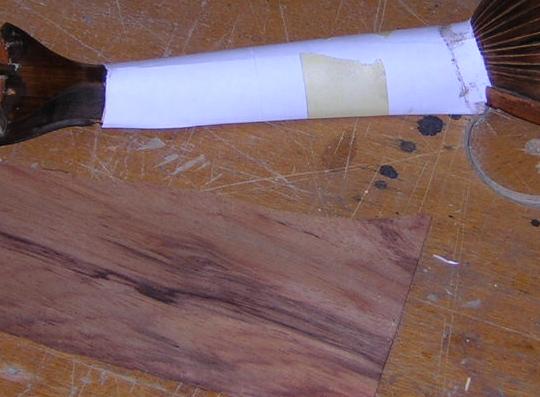
2. After removal of the furniture, the head is sanded smooth in readiness for a new veneer, cut a little large from a larger sheet.
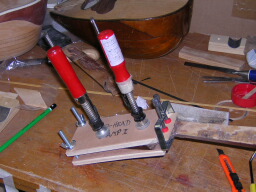
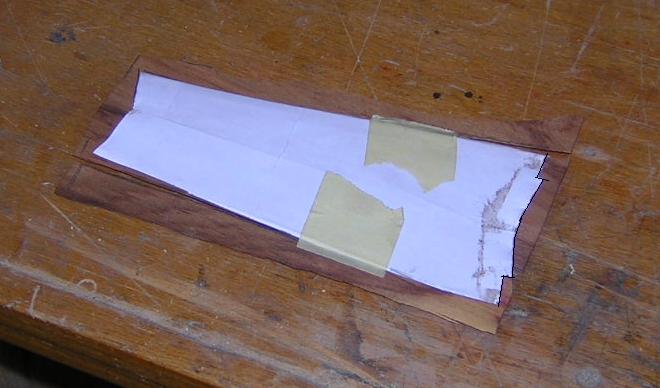
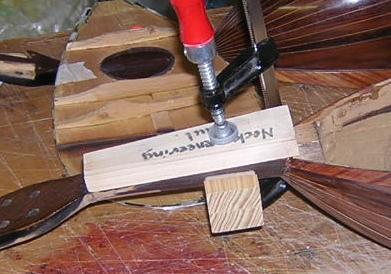
  3. The new veneer is then glued in place, and held under pressure by a clamp whilst the glue dries. Care must be taken here not to let the veneer slip as pressure is applied.   
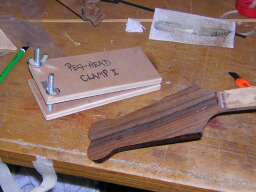
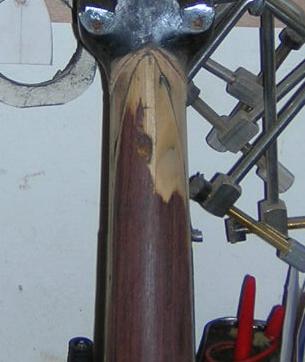
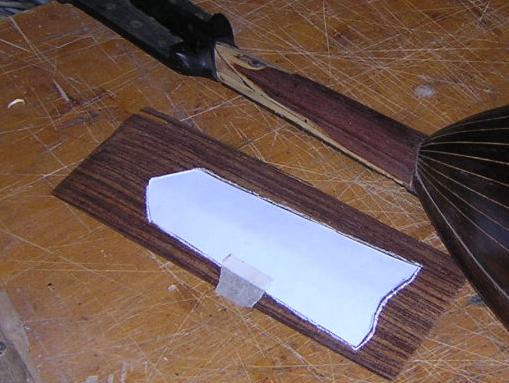
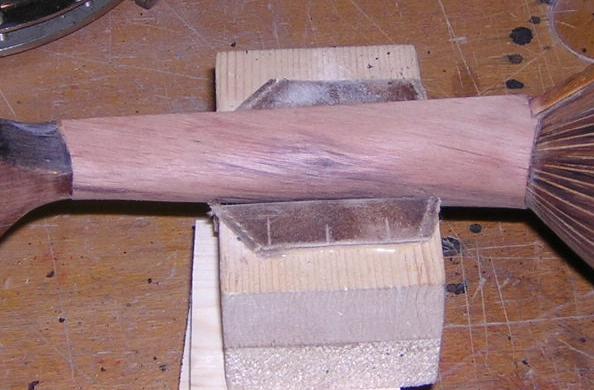
4. After the glue has set, the new veneer is then trimmed down to size, and the edges very carefully sanded round and smooth in readiness for the finish.
   *  Note: if you have to reveneer front and back, think about the tuner holes. It is so easy to forget and reveneer both only find you don't know where the holes are!!  *


Reveneering the neck       (For neck veneer, see the restoration parts page.)
There are often problems with Italian bowlbacks which have veneered necks. Occasionally the veneer will have lifted and split, but more often the problem is caused by damage to the neck or its join or simply by wear. Even after the neck is repaired, an ungainly scar remains, and the neck will need re-veneering.
1. 2. 3.
The first step is to make a paper pattern of the veneer needed to cover the neck. Pay special attention to the fitting at the body end. Make sure you know which way round the pattern goes, as often the necks, shaped by hand after the bowl was built on the neck blank, are not symmetrical. Transfer the pattern to a piece of veneer, choosing vertical grain direction if possible, and missing knots and so forth on the cut line.
4. 5. 6.
Draw round with a white pencil. Check the neck is level along all of its profiles, or the veneer will not lay flat. The veneer can now be cut out along the chalk line. Do not cut INTO the grain, as the thin veneer will easily split along grain lines. Try and cut across grains. Sides may be left a little long. Prepare a neck block to fit to the top of the neck. It needs to be tapered the same as the neck, and a couple of cms thick. Make sure the neck surface is flat and level.
NB   A good tip when cutting veneer, to prevent it splitting, is to cover the back, at least the areas to be cut, with masking tape.  NB
7. 8. 9.
Glue to the neck with a couple of small spots of wood glue.... not much, as it will be removed later. It is to give you something a little more substantial to wrap the tape around. I stick a couple of long pieces of masking tape to the 'good' side of the veneer. Glue is then applied to the other side and the tape used to bend the veneer around the neck's surface. The whole is then taped up firmly while the glue dries. Take care when removing the block, in case any glue has got between it and the veneer. Carefully cut any veneer standing proud at the sides if stuck, to stop it splitting down into the neck veneer.. After removal of the block it can be sanded down exactly level with the neck surface.